How to get good glide?
It turns out that prepping alpine touring, alpine and freeride skis is easy. It doesn’t take much equipment, and the wax you choose isn’t the be-all-and-end-all. Apart from the time and expense, there are only advantages – more glide, better protection. Here’s a quick guide.
- It’s good to have something to put the skis on – an old ski box with holes cut into it, ski vices, or something similarly practical.
- Scrape off old wax before you apply new wax. Then take a few strokes with a soft wire or brass brush to clean the sole of debris and dirt and to “exfoliate” loose, dry sole material to produce a fresh sole that glides better.
- Clean the sole with base cleaner and fiberlene paper.
- Heat the wax with a wax iron or an old iron from the charity shop (probably best not to use the steam iron you do your shirts with).
- Use a medium-hard wax (red/pink/purple) as an all-round wax. It works for most people. You can also use quick/universal glide or liquid glide when you’re out in the snow, as shown in the video below, but this isn’t as durable.
- Let the glider harden; you can put the skis out in the cold to speed it up. Allow ten minutes.
- Scrape with with a plexiglass scraper, making sure to get as much of the glide wax off as you can.
- Finally, brush until the sole’s shiny and smooth. You can polish it up to a pretty shine with a fine fibretex pad or a cork.
But I haven’t done my ski bases since 2008 or something.
o it’s been a long time since you last gave your skis some love. The edges are dull. The sole is the colour of marble. Might be worth considering taking them to the ski shop for a once-over. They can machine-sand the sole and get the edges sharp and angled with the electric plane. After this, you can do your ski bases yourself.
As with most maintenance jobs, a little bit every other day is better than an infrequent overhaul.
Glide wax – in detail
How to wax your skis
Drip wax (or crayon on the warmed edge of a block) and even it out on the base with the hot iron. The iron shouldn’t be hot enough to make the wax smoke. Remember to keep the iron moving at all times. When the wax has cooled, scrape the sole with a plastic scraper. Three good long passes or so should do it. Once there’s a razor-thin layer of wax left, go over the sole with a few strokes of the brush again. If you don’t have a sponsor and a race number you can probably skip this bit. Another, faster and more economical, method, is to rub the wax over the sole and then melt it in with a square of fiberlene between the iron and sole. This way you don’t even need to scrape. Once your skis are waxed, they’re ready for the hill. You might want to give them a quick brush down before you stick them in the roofbox.
Ouch – fixing base damage
Minor damage to your bases can often be repaired at home with a P-tex candle – a stick of base material you melt in to the wound. You light one end and let the molten material drip into the injury. You can also use a heat gun. First tidy the injury with a little fine sandpaper. Clean it with rubbing alcohol or degreaser before filling it in with P-tex. Fill the wound well. Press it down with something hard and let it harden a little higher than the rest of the sole. Cut away the excess with a wallpaper knife or sharp metal scraper. Finally, go over the patch with very fine sandpaper and a fine fibertex pad. You can also use a powdered repair compound. You sprinkle it into the ski-wound and then drip hardener on to the powder. It hardens in less than a minute. These methods are all right for minor damage. For major damage, however, a home repair isn’t going to cut it. The only permanent solution is to deliver the skis to a workshop for someone to weld new sole material into the damaged area.

Tailoring long skins for alpine touring
Wondering how to tailor your skins for alpine touring? Here’s an overview – care and trimming long skins for touring skis.
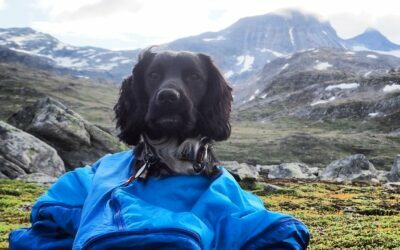
Care for the outdoors dog
All good research on dog training agrees: planning is key for keeping a dog happy and thriving. This applies when adapting to new environments and weather conditions. Ideally, your dog would probably be inside the cabin or at home in front of the fireplace as much as possible when it’s cold outside. But if we make the decision to take the dog out into the cold, it’s our responsibility to make certain that the animal’s well protected.

Wool is completely excellent
Norway’s famous for its changeable weather. Even in summer it can vary from 5° to 30° C. Such variable weather makes it difficult to know how to dress – which is why we say “ull er gull”: wool is gold. Wool keeps you warm in winter, and regulates your temperature in the summer. Wool is the best. A billion sheep can’t be wrong.
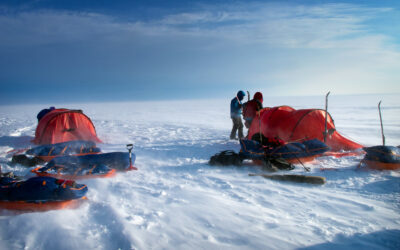
Setting up camp – essential routines
Preparation is, as always, everything. You can never be too well practiced and prepared. Take pitching a tent in strong winds, for instance. It’s something you can train for…

Everything you need to know about camber in cross-country BC skis
Lurer du på hva hva disse begrepen betyr og hva dette har å si for skiene dine? Ikke noe problem! Vi har laget en inngående forklaring på hva dette er og hvilken funksjon det har for skiene.
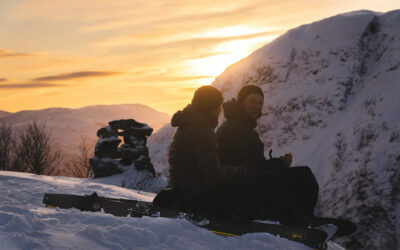
Using nature in Norway – like a Norwegian
Norway’s guarantee of the right to roam is a cherished part of our national identity.
But even though you’re free to move about throughout the country, there are still laws and regulations that must be respected.