Field repairs only have to get you home
What should be in a repair kit? There’s no definitive answer. Below we’ve listed some suggestions for a light kit. If there are thing you’d prefer to take, feel free to remix the list. But we reckon that these are a pretty good collection of basics to solve many problems. And remember – usually, you just need to fix the problem enough to get home. Then you can do a more thorough job with the tools you have there. One quick headline before we get started – make sure you know how to disassemble the pump for your burner, if you have one. Problems with burners are pretty common and usually happen when you’re tired and hungry – that is, when it’s time to actually use them. Knowing what to do can reduce your frustration enormously!
A burner that works when you want it to is a wonderful thing. Being able to fix a wonky burner is a heroic skill. Photo: Christian Iversen Styve
REPAIR KIT

Repair kit for an MSR brenner. Many of these parts are a pain to source elsewhere. Photo: Varri
Repair kit: the basics
Repair and maintenance of burners
Burners need to be maintained and given some love on a regular basis or they malfunction. Cursing a broken burner is virtually a rite of passage for Norwegians doing military service! The things that most often break on a burner are: Here’s a brief instructional video on maintenance and repair:Bindings
Loose bindings should be re-screwed tight. If the screws are broken, you must get the right screws for your bindings from a sports shop. While binding failures are rare, screws are light, and it’s wise to take some. Seal old holes with epoxy, PU-glue or the right plugs. If you have a binding that doesn’t sit correctly and you need new holes, these should be drilled 1.5–2cm in front of or behind the old holes (which must be sealed). Remember to fill the holes with the correct glue before screwing the binding back on.Broken skis or ski poles
Should you be unlucky enough to break a ski tip, you’ll need to improvise a solution until you get home. Your ski’s not really skiable. It’ll dig into the snow. Assuming your tip’s still attached, you can drill a hole in the tip of the ski, thread a cord through it, and bend the tip back up. After this, you can fasten the cord around or in the binding. If the tip’s broken off, you can screw in some splints and bodge it to get you home. Don’t over-worry about new screw holes: they’re the least of your problems. Whatever happens, the most important thing is to bend the forward section of the ski so that it doesn’t dig in. Here you just have to be creative. If you break a ski completely – that’s an issue. When this happens, it’s just a matter of getting from A to B somehow. Skis mostly break at the tip, in the middle or just behind the binding. Breaks in other places are pretty unusual. If you have sufficient real estate on your ski, you might try to move the binding so that you get a very short ski. Otherwise consider splinting the ski. You only need a short-term solution. You’re going to need new skis. Poles can be repaired in many ways. The easiest way is to splint it with a pipe clamp and tape. You can compress one pole at the break with pliers, force it into the other, and give the join a squeeze. You can buy repair kits, which are usually sections of halp-pipe and a clamp. If can’t splint your pole, then improvise. Find a stick or something (hopefully you’re not on windswept open tundra).Outer clothes
If you puncture the membrane of your Gore-Tex shell, it needs to be patched and glued from both sides. You can use Stormsure tape, glue (joint glue) or Tear-Aid. Best of all is a Gore-Tex patch with glue in the same colour as the jacket or trousers. Most specialist shops that sell decent Gore-Tex shells will be able to take it in and send it somewhere for a good fix. You can also take care of this for yourself with the help of your local Gore-Tex Service. Don’t use gaffa/ duct tape on clothing unless you really have to. It’s the stickiest substance in the cosmos (up there with klister) and the glue’s a real pain to remove. This may make it impossible to return your item if you have a warranty on it.Zips
Zip fasteners are one of those things you take for granted until they break. Zips on hiking clothes, rucksacks and sleeping bags get a lot of use. The most important thing you can do to extend the life of your zip is to keep it clean. Zips become especially slow if they are repeatedly exposed to salt water without being rinsed clean. In the vast majority of cases, it’s fabric or thread wedged into the zipper causing it to lock. If you can’t remove this easily, you can try using dish soap, dry bicycle lube, vaseline or something to loosen it. Often, the slider won’t mesh the teeth. If teeth are missing, the zipper’s broken. But if the main problem is that the zip doesn’t close properly, then it’s usually that the slider’s worn out. You can often carefully compress the slider with a pair of pliers. This is a game changer, especially when you’re out in the wilds – but possibly only a temporary fix. When you get back home, you can change the slider yourself or have a high street tailor (and sometimes a cobbler) do it for you.
Waxing and prepping alpine touring skis
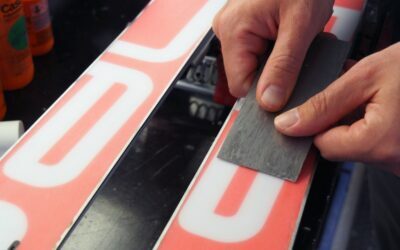
We don’t put in all that effort just for the view. We do it for the way down. So let’s talk about glide wax. It provides better glide, protects the sole from wear. The specific wax, even how carefully you do the work, isn’t really so important – it’s not a race. And it doesn’t have to be complicated at all…

Equipment tips for Expedition Amundsen
If you’ve signed up for the “world’s hardest expedition race” then you know it’s seriously demanding. Meticulous preparation is absolutely required if you’re going to make it to the finish line at all. This includes making the right choices about equipment. So here’s our guide to help.

Packing for alpine touring
Some extra clothes, a headlamp and a spare battery for the avalanche beacon. These go in the pack without thinking. But what else do you need? We asked mountain guides and our panel of experts what we should bring. Here’s what they said – with some useful advice and tips.

Planning a tour
“Better safe than sorry” doesn’t mean you have to be anxious- Planning isn’t just something that makes your trip to the mountains safer – it’s a source of inspiration.

Storing skis until next season
Putting your skis to bed for the summer, clean and protected, is a chore, but it’s got to be done. It’s more than worth it. Here we break down the basics. Your skis will thank you. Actually, you’ll thank yourself come the first snow – for all sorts of reasons…

Clothes for dogs in the cold
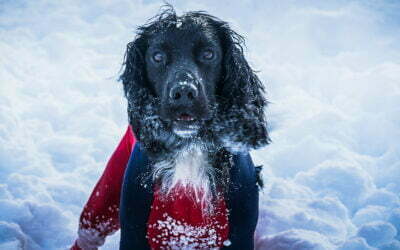
When it gets cold, spare a thought for you dog. Even dogs with a lot of fur can freeze if they don’t have an insulating undercoat. It doesn’t actually have to be much colder than -5° before many dogs can have problems – but there are still some who think dogs are unfreezeable. Here’s how to make sure they don’t.