Summary
Gimme shelter
Strong winds can make cooking difficult. If you fire up the burner outdoors, take shelter in the lee of huts, boulders or large trees. Or find your shovel and build a windbreak from snow.
Many of us would say: “I’ll cook in my tent, thanks. That’s what tents are for.” But the manufacturers of tents and stoves would say you should keep your stove well away. Check the instructions – cooking in your tent is totally prohibited.
You can see where they’re coming from. You can burn your tent down. Injure yourself. Put your life in peril.
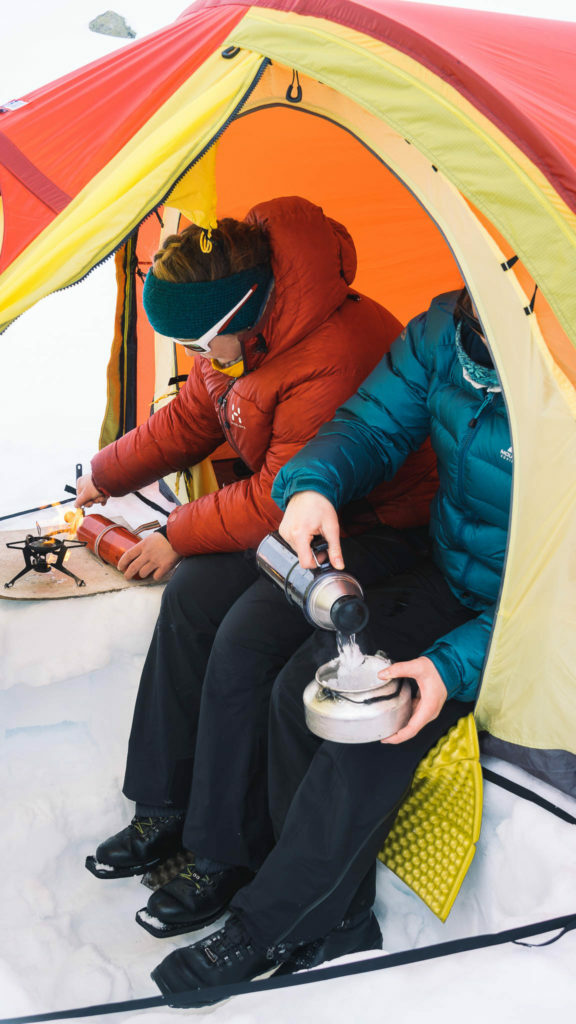
Sometimes, however, there’s simply no other option. If it’s possible to cook outside your tent, you should probably do that… but if you have to cook in the awning, you have to really know what you’re doing. Be familiar with your burner. And start with these safety rules:
• Start by digging a snow-hole in the awning. • Make sure there’s good ventilation. • Keep a constant eye on the flame.
The vast majority of us who spend time in the mountains sit inside the tent when we have to melt snow and cook. Many people, however, think that it’s not crucial to get the Primus itself out of the wind – which is missing a crucial trick. The windbreak has another important function: it prevents heat from dissipating from the ring, keeping it concentrated around the pan. This helps to reduce both melting and boiling times. You use a lot less fuel this way.
The same applies when it comes to lids as well. Always keep the lid on the kettle. Wasting energy is not just slow. It’s a waste of planet. Let’s not do that!
Stove-tray
A flat stove-tray to put your burner on is a must. It helps to keep everything steady and straight on the snow, which makes using your stove a bit safer. You can use anything flat, or make one from plywood if you can’t find anything; plywood’s easy to get hold of and easy to cut to size.
You might want to make it little oversized – this gives you somewhere to put down a boiling kettle without immediately cooling it (or melting a groundsheet…)
Ventilation in the tent is perhaps the most important thing to talk about here.

CAUTION!
The process of simply covering the flame with a pot serves, effectively, to cool it. This can contribute to what’s called “incomplete combustion” – a process that contributes to the production of carbon monoxide. This is an odourless, and pretty deadly, gas that we don’t want in our tent. Ventilation’s absolutely crucial. If there’s no wind outside, you can simply leave the door open. If the weather outside’s bad, bes sure to ventilate every five minutes: open the door long enough to replace the air inside the tent.
Carbon monoxide alarms are easily available, luckily, for some extra security. They can warn you when things get a little too poisonous. We’ve used these ourselves on longer expeditions, or when we’re responsible for several people. We have enough to think about without poison gas in the mix.
Carbon monoxide’s heavier than air, incidentally. It’s not a good idea to lie down with the door closed, waiting for the snow to melt, or to lose yourself in a good book. For obvious reasons to do with being poisoned.
Ventilation, ventilation, ventilation
A badly ventilated tent increases the risk of carbon monoxide poisoning.
Fatigue, dizziness and headache are the initial signs. If there’s more than one of you in the tent, keep a close eye on each other. If you’re alone, then you should really know what you’re doing if you light a stove inside. Avoid it, preferably; but if you must, be rigorous.
The first signs of high carbon monoxide levels are usually your flame beginning to pulsate and “bark”. With the burner placed in a hole, this effect will appear even earlier due to the lack of oxygen. This is potentially a life-saving indicator. If the pulsation and “barking” increase, make sure to ventilate properly. Open the doors to the tent. Ventilation is your best friend.
Lightweight tents are made of synthetic materials, all of which are highly flammable. So you must be sure that the stove’s stable (standing on a plank or a tray) and that nothing flammable (seating mats, down jackets, sleeping bags, and so on) are nearby.
How much fuel should I take?
Another question that commonly arises is that of how much fuel you should take with you. How much does a person spend per day on a winter trip?
As a good rule of thumb, 2.5 dl per person, per day.
This is more than enough for melting and cooking and a little to spare as a reserve. The exact amount depends on the type of stove, the outside temperature, and the time you spend cooking. Our recommendation is based on the fact that we’ve never run out of fuel when we have had a minimum of 2.5 dl per day – ever!
You can buy petrol for petrol burners in sports shops, mostly in 1 litre bottles. You can also buy it at petrol stations in 4 and 5L canisters (4 stroke environmentally friendly petrol, the same type used for lawnmowers). Fuel labelled 4 stroke has no added oil. It’s what you want to avoid getting soot everywhere and the risking of damaging your burner in the long run. Larger quantities work out cheaper if you get through a lot.

Once you’ve boiled water, don’t throw any away. Pour it into a flask or food container. You can later use it to make your next meal or hot drink. You can also use the flask as a hot water bottle to keep you warm overnight. Keep it by your feet or around your groin.Drinking is essential in low temperatures. We don’t just mean a nice mug of warming hot chocolate. It’s about fluid intake. When it’s cold, thirst is reduced; it’s easy to drink less than you need. But your body needs to be protected against dehydration. In turn, this also prevents the risk of both frostbite and hypothermia.Despite all these risks and stuff to bear in mind, winter tours are very rewarding. I love them. Nature’s more intense. There are fewer people. It’s like clearing out the brain. Give it a go!
Practice makes perfect!
Firing up the Primus in winter is all about practice and efficiency. The more you practice, the more efficient you become, which in turn means that you can spend time on the other things that need to be done before you crawl into your bag for the night.
Snow is just frozen water
Obviously, you don’t have to take all the water you need for a winter trip with you. This is where all that white stuff comes in. For snow, you need a burner, a very large pot – and some patience. The drier the snow, the longer it takes. If you’re melting ice, try to crush it before putting it in the pot. Many small pieces of ice, with their larger surface area, mean it’ll melt faster than a large block.
And remember that you don’t have to sit and watch snow melt. You can do other things at the same time!
Finally, we think it’s really important that you develop a relationship with your burner. Have a plan for maintenance and practice using it at home before you head into the wilds!

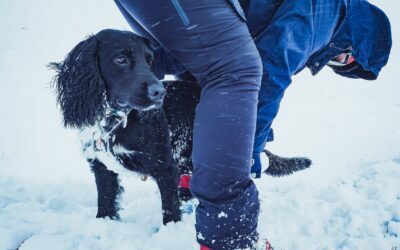
Learn first aid for dogs
Crister Næss, former Åsnes company stalwart, has several years experience as a dog handler in the Norwegian Armed Forces. For him, taking a first aid kit for the dog as is as natural as taking one for other humans.
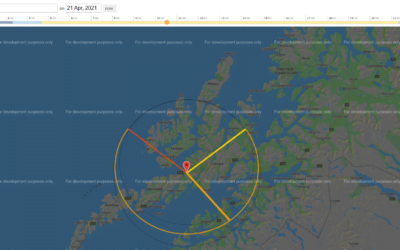
Digital tools for the ski tour
Don’t give up if your go-to spots are snowless or unskiable wastes. There could well be untouched, soft powder in them there hills! Read on to find digital tools for finding the white stuff when all hope is lost…
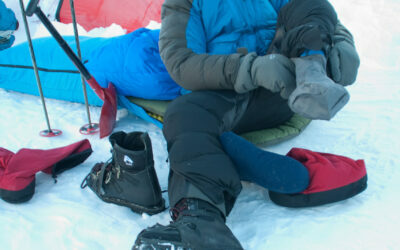
Handling hypothermia
Do you know what to do when you’re faced with someone dangerously cold? Command of the basic facts can be lifesaving – and this is just as relevant for us those of us who hit the mountains for the joy of it as it is for guide and members of the rescue services.
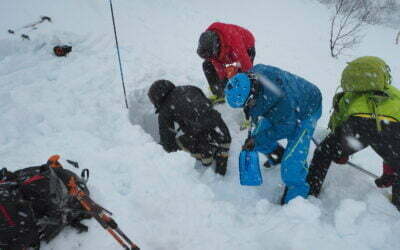
Eight reasons to take a course in avalanche rescue
Avalanche rescue is an essential skill, required by all of us who visit avalanche terrain. No one wants to have to use these skills – but if you ever need them, you need to have them down. True, the most important thing is to avoid being in an avalanche in the first place. But if something were to happen, every second counts. And this means training.
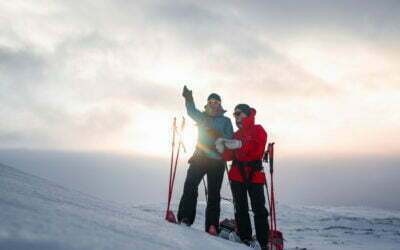
13 tips for better orienteering.
Few of us set out into the winter mountains when the weather’s bad and visibility’s poor. And we’re careful for good reason. It’s risky. When nature shows its muscles, it forces us to reflect. Even so, Norway’s a country with plenty of mountains and even more weather. If we only headed out when the sun was shining, the season would be very short. We head out when the weather’s less than perfect – which means we need to be able to find our way with a map and compass. Here are 13 tips for using a map and compass, then, for those of us hitting the mountains in winter.
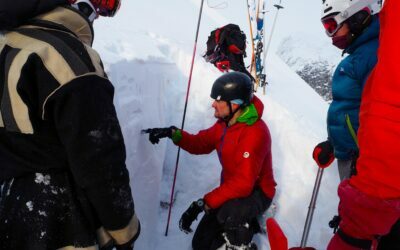
An avalanche course: the most valuable “gear” you can get
New gear is the best. Everyone loves gear. In fact, the only things better than gear are skiing and staying alive. To maintain this state of affairs, a knowledge of avalanches, navigation, terrain and the basic physics of snow is essential – it means the power to travel safely, on your own terms.