The difference between a full snow cover analysis and a quickpit
A complete and accurate inspection requires a full snow profile, with all the tests and analysis, for the entire snow cover. for hele snødekket er til for å kartlegge alt. Det vil si, man ser på temperatur i snølagene, korntype og kornstørrelse i hver av lagene. This means measuring the temperature and the type and size of the snow grains in each layer. You also need stability tests and temperature measurements every 10 cm. An analysis of this kind, made by digging your way to a proper snow profile, can take 45 minutes, at least, and up to 1.5 hours if done properly. That’s a long time getting to know the snow in a single place. And if you want to get a comprehensive overview of the full cover, you may need several such analyses in the course of a day in the mountains. But quickpits usually take a maximum of 15 minutes to perform. You only focus on the snow cover at the location relevant to you. The advantage of the quickpit is that you can do a number of them in the course of a tour without the rest of your party getting frostbitten. Several speedy digging tests in the course of a day offer a great deal of useful information and a better understanding of the snow cover, accounting for wind direction and altitude. Again, it’s not complete information. And it doesn’t allow a categorical conclusion. But some information is preferable to none.
The basics
Before you over-rely on quickpits in the field, there are some important things to remember. First, you should already have a good knowledge of the general layering of the snow cover and have appraised yourself of the avalanche forecast. Quickpits are great for when the snow conditions have changed: more snow, moderate to strong winds or large temperature swings, say. If and when you have a deep understanding of the current snowpack, the question essentially becomes “Am I missing any information?” when using quickpits. If you’re in a new area, or you haven’t been out for a few days (or weeks), it’s important to spend some time in a standard snowpit or two to gather a basic understanding of stability, current avalanche issues and weather history in the area before you rely on quickpits alone. But once you feel you understand the context, quickpits are a useful means of gathering information.Learn the danger signs!
Step 1:
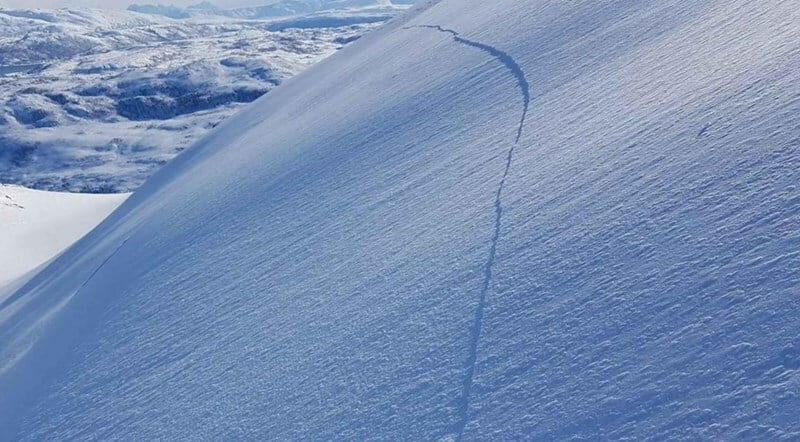
Ask yourself: “What’s the history of the snow-cover, weather and wind?” This is a vital part of any assessment. Seasons with persistent weak layers and deep persistent weak layers require different assessment and management tools to seasons where avalanches can be triggered in wind-driven snow or weak layering due to inadequate bonds in this snow. Get acquainted with the snow and weather history and the avalanche evaluation for the day. Use a hypothesis that can be tested by quick digging tests.
Check varsom.no and RegObs. Read up on the avalanche warnings, analysis, and weather and wind history.
Analysis
In an avalanche alert, the potential trigger points are particularly deserving of attention. An avalanche is caused by a combination of terrain and a potential trigger point in the structure of the snowpack. Anything that can help you be aware of this combination of terrain and concealed threat, in different conditions, is key in avoiding danger.
Step 2:
Choose a suitable, not-so-exposed, place to assess stability. You don’t want to get caught in an avalanche when you’re in the middle of assessing the snow! According to recent studies, you can get relevant ECT (Extended Column Test) results in gentler terrain, too. Basically: you don’t need to be in classic avalanche terrain to assess the stability of the snowpack.Step 3:
Use your probe to penetrate the cover, looking for a representative depth. Don’t dig in the deepest place: dig in an averagely, or below averagely, deep spot. The aim of the pit is to understand what’ll happen if you hit a weak spot on your descent. You won’t find out if you only dig in the deepest snow.Step 4:
You’re digging to assess snow cover. But you can treat this digging as training. Digging a pit 100–110cm wide is fine. But you can dig wider or narrower, depending on the tests you want to do and how difficult the digging is.Step 5:
Once you’ve dug the pit, note the wind direction, the elevation, and the gradient. If one of your day’s goals is to arrive at a full picture of the area’s snow cover, it may be useful to seek data accounting for a variety of different wind directions and altitudes. Know where you are when you dig.Step 6:
Get down in your pit and do a hardness profile. You’re looking for a recipe for an avalanche: flake, a weak layer, crust, or typical layers on which the snow slides. Is there a soft layer under a hard layer? Look for thin grey lines in the snow – lines are often edge grains, surface hoar or melt-freeze crust, and they’re guilty of instability until proven innocent.Evaluating your findings
By now you should have a more detailed hypothesis about what the snow cover is like in the area you intend to ski. Questions you might want to answer include: How reactive is this snow? Are the predicted avalanche problems present here? Do I see propagation in this pit? When you have a hypothesis to test, you can conduct a stability test.I start by making a quick cut with the tail of my ski (like a narrow shovel edge). This helps me identify layering and to access to the rear of the column I’ve dug out. Here I often test a small column with the shovel, just to see what comes loose where. That’s useful initial information.
From there I can easily cut a column for an Extended Column Test (ECT). Doing an ECT, I’m looking to test the failure of the weak layer, to see if there’s propagation throughout the column, and understand the load that causes it. If it fails across the entire column rather than under the load alone, I have propagation, which is a huge red flag. Then I have to adjust my terrain choice. Fracture propagation can unleash things above me, and at a distance.
If I get uncertain or confusing results, I do one of two things. I either do another ECT, above my pit, or I do a normal compression test. Repeated results offer a firmer diagnosis of the cover.

Simple pit and compression test.
Photo: Crister Næss
Bottom line
We use quickpits as a way to test INSTABILITY rather than stability. Results pointing to instability help us to make decisions. If our tests tell us that the cover’s stable, it drives the decision-making process less; it doesn’t tell us that we’re entirely safe. Signs of instability carry more weight. You have to weigh the information, the danger signs, and the possible consequences accurately. Red flags count for more than indicators of stability. Stability is not a constant; a red flag is far more concrete; it is probably a sign of a more extensive problem. Quickpits are a great tool for assessing the snow cover in the field. The more holes you dig in a day, the better your understanding of the current snow cover. The downside is that a quickpit won’t provide entirely sufficient information in itself; such tests are just one of many tools you should have in your repertoire. If you get reliable, clear, information, and see danger signs such as cracks, falls and recent avalanche activity, then it’s even entirely necessary to stick your shovel in the snow. You have the information you need – there is danger here. No matter you education and experience, you can’t outsmart an avalanche. Start with the fundamental question: “Do I have tactics for avalanches?” and build from there. The next question us “Do I have the knowledge to handle this in a safe way?” The more efficient you are at digging, the more information you can gather while you’re still out skiing. Save the information. Note it down and use it to help you build hypotheses the next time you’re out on tour.
13 tips for better orienteering.
Few of us set out into the winter mountains when the weather’s bad and visibility’s poor. And we’re careful for good reason. It’s risky. When nature shows its muscles, it forces us to reflect. Even so, Norway’s a country with plenty of mountains and even more weather. If we only headed out when the sun was shining, the season would be very short. We head out when the weather’s less than perfect – which means we need to be able to find our way with a map and compass. Here are 13 tips for using a map and compass, then, for those of us hitting the mountains in winter.

The Mountain Code
Being mountain-wise isn’t a question of knowing what you should and shouldn’t do. It’s about having a conscious relationship with nature; the choices you make; the actions you take. The Mountain Code guides everything from planning you trip to adapting your plans according to what greets you out in the wilds. Here’s a look at the rules, with material largely taken from the creators of the new Mountain Code (2016), the Red Cross and DNT.
Eight reasons to take a course in avalanche rescue
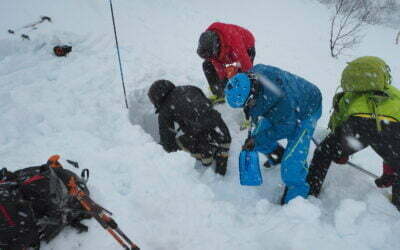
Avalanche rescue is an essential skill, required by all of us who visit avalanche terrain. No one wants to have to use these skills – but if you ever need them, you need to have them down. True, the most important thing is to avoid being in an avalanche in the first place. But if something were to happen, every second counts. And this means training.

Seven tips to find a safe route up the mountain
Here are some simple, concrete, tips on how to find the safest route up a mountain on skis. Some things in life are necessary. Some things aren’t necessarily easy. But, as every skier knows, the only thing that really matters is skiing as much as humanly possible – so getting these down is a question of making life worth living.
Digital tools for the ski tour
Don’t give up if your go-to spots are snowless or unskiable wastes. There could well be untouched, soft powder in them there hills! Read on to find digital tools for finding the white stuff when all hope is lost…
Life-saving first aid in the wilds
A bad fall. A collision. Exposure. Preparation might save a life. As always, it’s a matter of planning and the right packing. With a little knowledge, some practice (and some way to contact the emergency services) you’ll have the basics covered. This could make a life-saving difference.
