
Christian Iversen Styve
Eventyrer, polarguide og fotograf
«Prøv deg frem med forskjellig avstand, men jeg kan avsløre at når avstanden til teltet er omtrent lik høyden på veggen, så har det fungert veldig bra for min del.»
Why build a windbreak?
A really good winter tent can withstand almost everything nature can throw at it. So why spend the time building a windbreak? I don’t often build them when I’m out on an expedition. But sometimes, it’s just sensible; it’s a matter of taking precautions. On expeditions lasting several weeks, it takes far too much energy to set up a windbreak every day just in case the weather turns bad. We use weather reports. We’ll only put up a wall there’s a lot of wind expected. Especially if we’re expecting 20 to 25 m/s or more. There are two main reasons for this: to both protect the tent against heavy punishment and to reduce the fabric flapping in strong winds so you can get a good night’s sleep. If you build a good wall, it can reduce the load on the tent considerably. This applies to both the load on the fabric of the tent and on the guy ropes (among other things). The guy ropes tend to fail long before the canvas does. I still have the pleasure of seeing a tent cloth tear due to strong winds. Building a windbreak’s a great way to warm up your body on a cold winter’s evening. It doesn’t take that long, either. It’s worth the extra trouble of getting one up.How big should the windbreak be? And how far from the tent?
A windbreak made of snow is definitely something you want when the weather’s at its worst. If you build it well, it can also play its part in letting you get a good night’s rest. A windbreak’s purpose is, unsurprisingly, to prevent wind as much wind as possible from blowing directly onto the tent. But where should you place it? And how wide should it be? First things first: the wall shouldn’t be too close to the tent. If it is, snow that naturally accumulates behind it will collect on the tent. And there’s also a risk that it’ll topple over on to the tent. Try different distances – but, for me, when the windbreak’s roughly as far from the tent as its height, it works very well. As for the best width, in my experience the wall shouldn’t be much wider than the tent. If the wall’s too wide, a great deal of snow tends to accumulate along the sides of the tent. If the wall’s about the same width as the tent, the wind carries the snow away. If it’s both windy and snowing heavily, it’s incredible how much snow can accumulate in no time. Preventing snow accumulating means you don’t have to leave the tent at regular intervals to remove it from the tent. If it’s cold and windy outside, it’s far better to take a quiet day recuperating in the bag.Don’t want to build a windbreak? Try this
Here’s good tip for those who want a stable tent but aren’t keen on building a windbreak. Many modern winter tents give you the option of using two poles in each pole channel. This considerably increases the tent’s stability. Check whether this is possible on the tent you have or the tent you’re thinking of buying. Personally, I use double rods in the channels facing the wind. On long trips, I take extra tent poles with me anyway, so I might as well use them rather than just leave them lying in the pulk. If you’re on a trip where the wind stays below 15–20 m/s, there’s not so much point in building a windbreak. It’s true that today’s winter tents can take a lot of punishment. But while it’s perhaps not worth getting so anxious about the tent collapsing, it’s still good practice to spend some time learning how to build a windbreak. Then you’re well prepared if you really need one one day.
HMore than enough room for a couple of poles in the same channel. Photo: Christian Iversen Styve
Things to remember when building a windbreak
It pays to be thorough. If you spend the time to get it right, there’s a much greater chance it’ll stay up until the next day – possibly even longer if necessary. The right width and distance from the tent is perhaps most important. Bear in mind it can topple over against the tent in strong winds. Place your pulk at the opposite end of the tent to prevent snow from collecting there, too..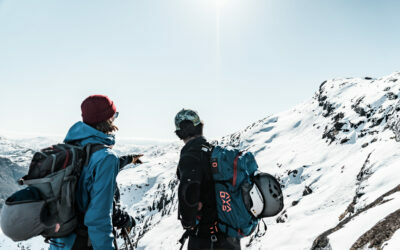
Planning a tour
“Better safe than sorry” doesn’t mean you have to be anxious- Planning isn’t just something that makes your trip to the mountains safer – it’s a source of inspiration.

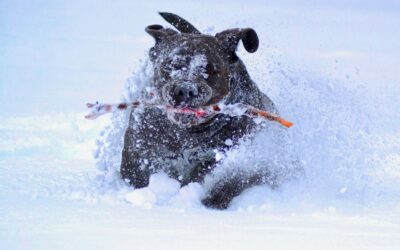
How to feed a hunting dog
Correct nutrition is the alpha and omega for a healthy, strong and happy hunting dog performing to its limits day after day in the mountains. A well-trained hunting dog can quickly cover more than 60 km in hilly terrain, marshes and woods. So if you’re out for a number of days, feeding is everything.
Replacing and renewing glue on skins
Unfortunately, skin glue doesn’t last forever. The skin itself, on the other hand, only gets better and better until it wears out. So if you replace the old glue, your skins can last many years. Moribund glue can be replaced, either with tape or sheets, or from a tube. We explain how.
The NFSA guidance for outdoor dogs
The Norwegian Food Safety Authority (NFSA)’s rules for keeping dogs outdoors, and for interacting with dogs, is useful for adults and children alike.

Dressing for adventure: what to wear in the wild
Norwegian grandmothers have it right: always wear wool against the skin. Beginning with wool as the first layer, the three-layer principle applies. Step this way for a guide to wrapping up warm in the wild.

Tips for taking a dog into the wilds
Positive training and positive experiences in the outdoors make for a confident dog. But setting out in winter is something a little different – especially if you’re overnighting. So we’ve put together some good rules, tips and tricks to make the experience the best it can be. There’s nothing to prevent these tips being applied in your everyday life with your dog, either!