The obligatory checklist
The question of how to handle and minimize the danger and risk of injury and avalanche is of course, impossible to completely answer. One thing that’s certainly true, though, is that it’s crucial to do all the little things right: the small details, the things that can separate a good trip from a bad one. There will always be dangers in alpine environments. Anywhere in the mountains, and driving on the road for that matter. In the same way that we make good choices, respecting the weather when we drive at an appropriate speed, safety in the mountains starts with respect and understanding for and of the dangers in nature. With this on the way, you’re well on your way. The devil’s in the details, as we say. Especially when these details have to do with avalanches. Think of off-piste skiing with the same meticulousness as climbers tying ropes or pilots preparing for take off. Forming a mandatory checklist and a buddy check is a good routine! You can add whatever you like to this list. But we recommend these as a minimum.“The season’s first dumps of snow are fantastic – the waiting’s over. But it’s really important to know that avalanches are easily possible, already, as a result of the first big snowfalls.” Åsnes Academy Expert PanelHere’s the checklist we go over before we click into our bindings for the first time that season. It doesn’t take long and makes it easier to avoid minor mistakes with major consequences.

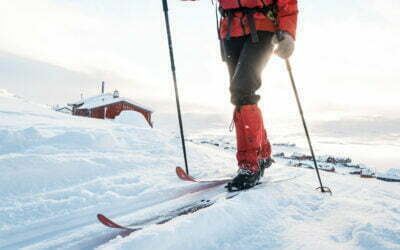
Nothing beats days like these. But we have to get home safely, without forgetting pre-tour essentials. Photo: Sondre Folkedal
1. Gear check!
Put new batteries in the your avalanche transceiver. Make sure the battery compartment’s shiny and clean (acid corrosion can prevent the battery making contact, if it hasn’t destroyed the circuit board altogether). Give bindings, boots and skins a once over. It’s also a good idea to have some extra equipment in the car: extra avalanche equipment, skins, batteries, sunglasses, sunscreen. It’s so easy to leave things on the kitchen table or inside, right by the door. We’ve all done it. It saves a lot of time and means you don’t have to return to collect important equipment, cancel the trip, or decide to head out without things that might be essential.2. Hurry slowly: take your time
Give yourself three times as long as usual to get ready for your trip out. It’s all too easy to forget things at the start of the season. Again, we’ve all experience it. Hurry slowly: have a good breakfast, take the time to check that you have everything, and you’re more relaxed when you get in the car. Don’t rush or stress the first trip. That’s the way to get the little things right.3. Practice makes perfect
A few warm-up runs down the resort slopes is a good idea. Get sharp with a little carving on dependable groomers rather than the season’s first sketchy cover, with all the rocks and stumps waiting to greet your bases. As soon as there’s snow on the ground, or when you’re warming up on the resort slopes, you have a great opportunity to practice your rescue skills. Get the beacon out. This is especially important if your ski partner’s invested in new avalanche equipment or doesn’t have much previous experience with this before!4. Skaff deg lokalkunnskap
Before you fly off mountainwards, go online; check the map; do your preliminary work by reading avalanche observations; read the avalanche warning at www.varsom.no. Familiarize yourself with local avalanche conditions and refresh yourself on the mechanics of avalanche snowpack. It’s always good practice to check the weather for a good 48 to 72 hours before you set out to see if there have been major changes in conditions: sun, wind, and snow. Check the avalanche warning. Specifically take note of the danger level before digging a little deeper into the information to look at avalanche activity, avalanche analysis, and what the warning indicates about the snowpack. Use of all this information to help you choose a route both up and back down that specifically avoids these problems.5. Get consensus on the plan
Get on the same page as those you’re heading out with. Make sure everyone understands where you’re going. Specifically discuss plan B and plan C if plan A is a write-off. Clarify expectations: the goal of the tour; the risks everyone’s accepting; that everyone has a handle on what it will take to be safe.6. Pre-flight parking-spot safety check
Once you’re out of the car, staring up the peak of the day, check that everyone has a minimum of 60% on their beacon battery. Do a two-way-buddy-check to make sure that your transceivers work in both SEND and SEARCH. Make sure everyone has theirs on, properly, under a layer of clothing. And checking that the search probe and shovel are actually packed, and not in the trunk or garage after digging out the car, is totally mandatory here.7. Get your beacons right
Check that your avalanche beacon’s in the right place. If you have it in a harness, wear at least one layer of clothing over it. Some like to have it in a pocket with a good and solid zip. Don’t put it in a velcro pocket. Make sure that there’s nothing else in that pocket so that it stays zipped all day. Don’t put sunscreen, a neck-warmer or chocolate in the same pocket. If you ever need your beacon, you’ll want to find instantly. You won’t want a Kvikk Lunsj.8. Take it easy
Skiing after the first snowfall means lurking rocks and shallow snow cover. Keep a little in reserve for the first true dump: ski with care, and wear a helmet!
Ten tips for a better experience with skins
Skins open the door to wonderful experiences in nature. When they fail, though, it’s very frustrating. Luckily, with proper treatment, storage, and a few tricks, your skins will last forever and won’t let you down when you need them.

Equipment tips for Expedition Amundsen
If you’ve signed up for the “world’s hardest expedition race” then you know it’s seriously demanding. Meticulous preparation is absolutely required if you’re going to make it to the finish line at all. This includes making the right choices about equipment. So here’s our guide to help.

How to use Åsnes short skins
Wondering how to use Åsnes short skins? Not sure what these skins are good for and what the point is? Or wondering how to install a short skin? How to customize them? Whatever it is, here are the answers.

Field repair kit
Bringing a repair kit can be very useful, even if you’re not going on a long expedition. Preparation, as always, is never a bad thing.

Packing for alpine touring
Some extra clothes, a headlamp and a spare battery for the avalanche beacon. These go in the pack without thinking. But what else do you need? We asked mountain guides and our panel of experts what we should bring. Here’s what they said – with some useful advice and tips.
Boots for cross-country skiing in the backcountry
Nothing ruins the skiing experience as effectively as foot-related woe. Blisters. Wet socks. Sore arches. These things are the enemy. Good ski boots are incomparable – cherish yours once you’ve found them. Here’s a guide to help you find them.