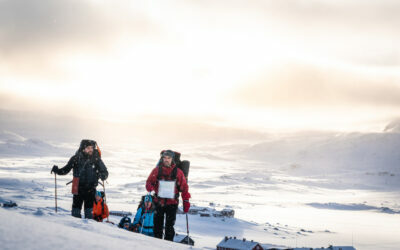
Good routines
Before the season starts, some basic routines are the nearest we can get to skiing. Change the battery in your avalanche beacon; clean and re-impregnate your shells – and give your skins, skis and bindings a once-over. Here, we’re talking skins.
Skins are often neglected. Spring, especially, can be hard on the glue; the snow can be dirty, and we pass over vegetation and rocks. But skins are the most important tool we have for getting to the top so we can come down again. We really want them in good condition on the first good snow day!
First of all, some basic skin-care tips (we repeat these elsewhere, but they’re important – so here we go!
Keeping skins in shape
Skins are a wonderful tool for opening the door to experiences in nature. There are just a couple of things you can do to keep them performing as they should. Here’s what every skin-owner should know.
1. Keep the adhesive clean and dry
One of the most important rules for keeping skins happy is to keep the glue away from dust, dirt, vegetation, stones, dog hair, carpets, and anything else that can get stuck in there.
2. Remove ice and snow from the glue – they’ll stick
Out in the mountains, snow and ice get on to the glue. It’s just the way it goes. You can usually just brush it off with a glove. If there’s a lot, you can scrape the back of the skin over a steel edge. You can also just fold them up and put them in an inside pocket. The ice and snow melt, the glue warms up and the skin might dry a little. Then it’ll stick.
3. Beating the cold
When it’s really cold, the skin gets cold too. This means a stiffer skin and stiffer glue – maybe even a skin that doesn’t want to stick to the ski. When this happens, warm the skin with body heat under your jacket. On long days below -15° or thereabouts, stick the skin into your inner pocket when you’re not using it.
4. Good routines
Glue tends to fail at the back of the skin first, sometimes at the front by the attachment. This is where snow, ice, water and dirt are most likely to get into the glue. Check your skins regularly; remove vegetation and other obvious stuck in the glue; store the skin in an inner pocket if necessary. Also bring a stick of skin wax to prevent the skin from absorbing moisture. Maybe even a tube of skin glue for spot-repairs in the field if necessary.
5. Emergency solutions
If things really go south, a ski strap, gaffa tape or sports tape can save the day. Or at least give you enough to get out of the mountains. But we repeat: routines!
6. A dry skin is a happy skin
Wet snow exists. In the spring, it’s a real hazard. This can lead to very damp skins. These are perfect conditions for skins becoming ice-magnets. Especially if temperatures fluctuate. At this point, enter skin wax. You should ALWAYS have some skin wax in your pocket; it can save the day! The other thing you can do is stick glide wax on your skins in almost the same way you would with your glide zones. The wax protects from wear; it stops moisture getting in; it improves glide. Between uses (and out in the field) skins can dry and warm up in your inner pocket. Again, good routines and preparations are key here. Give you skin a good waxing before you set out, or at the start of the season!
7. Icing? No thanks
OK, so – you forgot to wax and your skins are covered in ice. Well, no one’s perfect. All is not lost. First, scrape away what you can using a steel edge, a wax scraper, or whatever you have to hand. One of us has used the old iPhone 5 with the sharp sides before. Leave the skins on. Try to scrape from the front tip all the way back to the rear tip. You’ll probably be able to squeeze and scrape enough out. If it’s sunny, you can put the skin in the sun with the problem side facing the sun. They might dry out a little when you have your sandwiches. Finally, you should apply skin wax – and LOTS of it. If you don’t have any to hand, use what you have. Vaseline. Sunscreen. Silicone. Cooking oil. When you clean it off, don’t spray base cleaner on to the skin – use a rag.
8. Always dry skins – at room temperature!
All wet equipment should be unpacked and dried. This is particularly important for skins, because, as we say in Point 6, a dry skin is a happy skin. However, skins should NOT be exposed to direct heat. Don’t put them on heated floors, or near a stove. Hang them on a drying line at normal room temperature. When dry, store them somewhere cool, away from sunlight. A cellar, a garage – somewhere like that.
9. Proper storage between use
Most of us store our skins stuck glue-to-glue. But when skins are to be stored for a long period, over the summer for example, it may be good to use a mesh skin-protector between them. Just to be safe. Again, store your dry skins somewhere cool, away from sunlight. In the cellar or in the shed.
10. Re-glue your skins when necessary
Sooner or later, glue wears out. It ages; it’s had enough of snow and fingers and grip wax and being dried above a wood-burning stove in huts. This doesn’t mean that the skin’s finished, though: skins get better and better with use. Re-gluing a skin takes a little time from your afternoon, but there are several methods now. And glue’s much cheaper than a pair of mature skins with stories to tell.
Changing skin adhesive
When skin glue becomes degraded, skins peel off when you don’t want them to. At a certain point, the only option to prevent them flapping about is to replace the adhesive.
You will need the following tools:
How it’s done
When working with skin glue, make sure you have a clean and tidy workbench. If you’re changing the glue because it’s dirty (full of dust and dirt) or plain worn out, you want to avoid immediately contaminating it before you’ve even hit the snow. Old skin glue can get everywhere if you don’t have a plan for dealing with it once you’ve scraped it off. But this is easy:. make sure it goes straight in the bin.
Which cross-country skis? And how long?
Choosing new cross-country BC skis is can be bewildering. We compare length, width, profile. We weigh ourselves and check again. We ask advice on forums. We change our minds repeatedly. So before you pull the trigger, set your mind at rest by reading this overview. If you’re still unsure, you can talk to the expert in your local specialist shop or contact Åsnes’s customer service – we answer questions the whole time and we can usually help!

Dressing for adventure: what to wear in the wild
Norwegian grandmothers have it right: always wear wool against the skin. Beginning with wool as the first layer, the three-layer principle applies. Step this way for a guide to wrapping up warm in the wild.

Tips for long distance ski tours
The first thing I want to say is that if you’re dreaming of something – do it. Just start making it happen! Don’t put it off. Because if there’s one thing that’s certain, it’s that you won’t regret it. It’s amazing what you can achieve if you only begin.
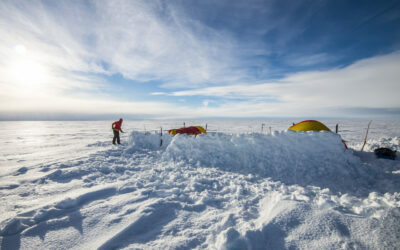
Building a winter windbreak for you tent
To build a windbreak from snow, or not to build a windbreak from snow? This question comes up a lot. Here’s our advice – with a tip for those who’d rather not make the effort…
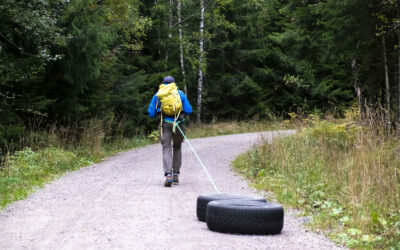
Tyre training
Get started with tyre training – the best way to prepare for an expedition or the coming ski season.

Preparing for Åsnes Expedition Amundsen
Dreaming of an adventure in the winter mountains? Or a lover of endurance races? Maybe Åsnes Expedition Amundsen is for you. But you’ll need to be ready.