New skins?
If you’ve just got some new skins, or your first full set for the mountains – boots, beacon, helmet, poles, skis and skins – you’ll be anxious to get your skins right.
Today, most skins come in fixed lengths and widths. They also have fixtures at the front, and preferably an adjustable fixture at the back, allowing you to adjust the length for your skins. Skins typically come in “clothes sizes”, from extra-small to extra-large. A glance at the size chart or packaging well tell you which one you need.
Does the skin have to cover the entire sole?
No. A skin made for getting you to the top of a mountain doesn’t have to cover the entire ski base. That would be a lot of skin. Neither the tip of the ski and the rear 20cm of the skin are used when you’re propelling yourself. It’s also not a big problem if the skin’s slightly narrower than the ski’s widest points. All you need is relatively good coverage underfoot. Less skin under the ski means less resistance. Which means better glide. You don’t want to lift your skis from the snow while you’re ascending. Generally, most “universal skins” come in 120–130cm widths. This should work in most cases.
Tailoring your skins
Care for the outdoors dog
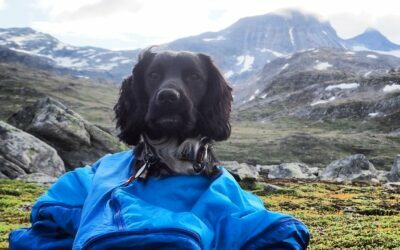
All good research on dog training agrees: planning is key for keeping a dog happy and thriving. This applies when adapting to new environments and weather conditions. Ideally, your dog would probably be inside the cabin or at home in front of the fireplace as much as possible when it’s cold outside. But if we make the decision to take the dog out into the cold, it’s our responsibility to make certain that the animal’s well protected.

Packing a pulk
A quick introduction to packing a pulk. And a few words about the wonderful combination of pulk and skins. We’re having fun in pack-a-pulk-o!
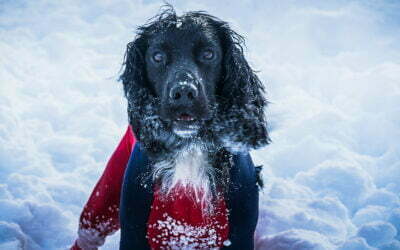
Clothes for dogs in the cold
When it gets cold, spare a thought for you dog. Even dogs with a lot of fur can freeze if they don’t have an insulating undercoat. It doesn’t actually have to be much colder than -5° before many dogs can have problems – but there are still some who think dogs are unfreezeable. Here’s how to make sure they don’t.

17 excellent gear hacks for the wilds
If you’re heading out to the hills, you want to pack as light as possible. In which case, your stuff must multi-task. In that spirit, here are 17 of the best gear hacks we know.

Everything you need to know about camber in cross-country BC skis
Lurer du på hva hva disse begrepen betyr og hva dette har å si for skiene dine? Ikke noe problem! Vi har laget en inngående forklaring på hva dette er og hvilken funksjon det har for skiene.

What’s inside your skis?
What are the skis made of? How are they made? What sets Åsnes apart? Here’s that guide to the inside of our skis you were looking for!